
Make My Trail
Need more help than you find here? Please Contact Us!
Make My Trail turns your iPhone or GPS-equipped iPad into a powerful tool for recording your outdoor activities and converting them into interactive trails that you can share, analyze, and follow again. Interactive trails are not simply the path you followed, but guidance aids with the following unique and useful features.
On Trail
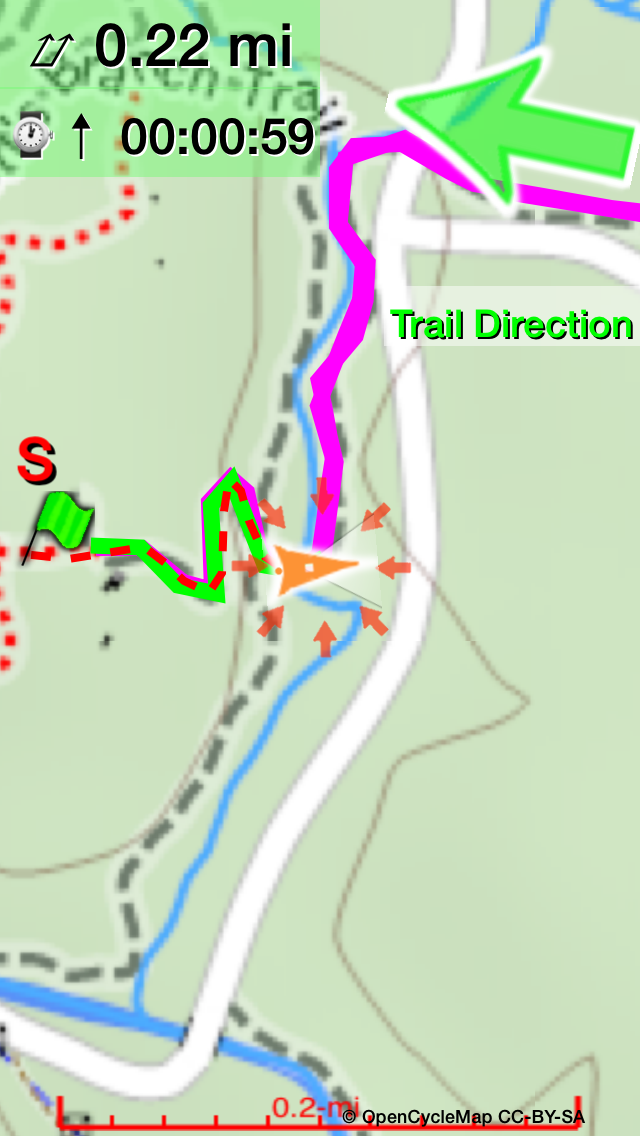
o Make My Trail uses interactive trails to point you in the direction of the trail ahead – eliminating confusion when trail markers are missing
o The traversed trail is shaded green to indicate your progress along the trail – so you can immediately see how much trail lies ahead and behind you
o Alerts inform you if you wander off course, or reach the end of the trail – letting you correct navigation mistakes before you’ve gone too far
Off Trail
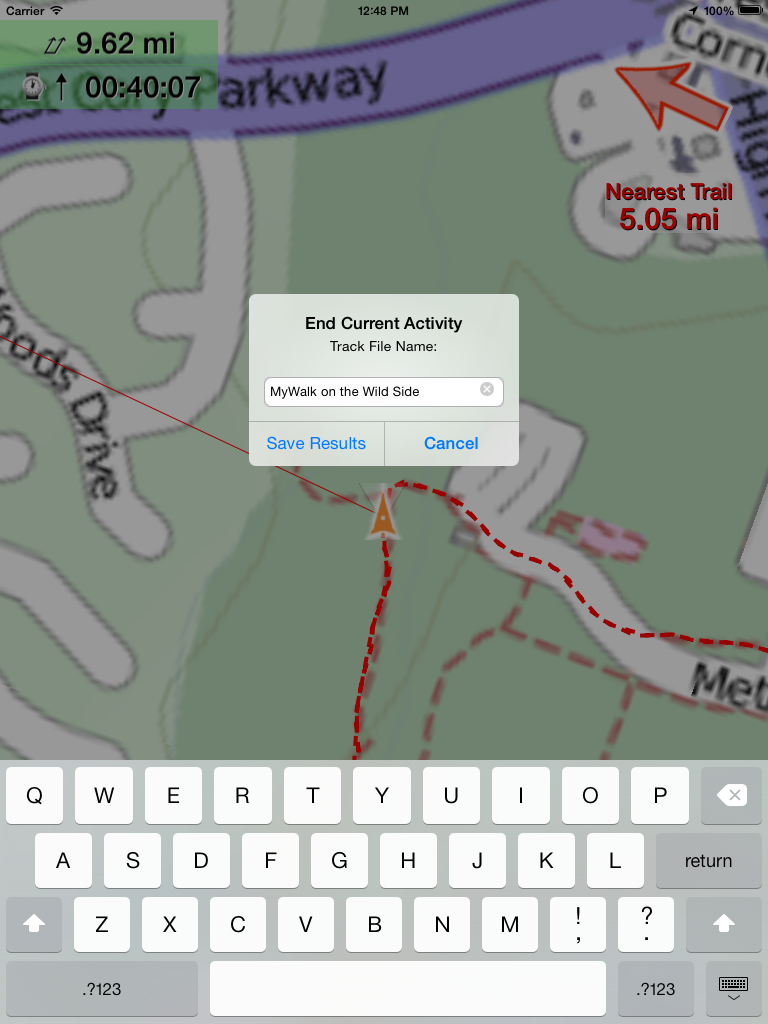
o Points you to the closest point on the trail and indicates the distance to it – so you always know how to find your way to the trail
o Alerts inform you when you arrive at the trail, or reach intersections of other known trails
o Select a trail as your destination by simply tapping it (tap it again to deselect)
On and Off Trail
o Displays your trails as high-contrast overlays that display atop any base map
o Provides name and length information for each trail
o Shows your location and direction – you’re not just a blue dot, but an arrow indicating which direction you’re headed
o Open the Trails Table to view a list of all enabled trails with direction and distance shown
In addition to creating and displaying interactive trails, Make My Trail records your track, and displays elapsed time, traversed distance, battery level, time-of-day, and even your step count. Select metric or imperial units. Track recording continues when the app is minimized, with audible background notifications when you leave an interactive trail or intersect a new one.
Trail Creation
Creating and sharing your trails is simple:
1. Start the app – Make My Trail will alert you when it has found your position
2. Tap the “go” button to start recording your track.
3. Traverse the trail you’re wanting to create – this is the only time you’ll have to do it without assistance from an interactive trail!
4. When you reach the end of the trail (or you’re just ready to turn around and head back) tap the “stop” button to stop track recording – your track is saved automatically
5. Open the files folder, touch-and-hold the track you created for 3 seconds, then select “Convert to Trail” – Done
The tracks, and the trails you create from them, are all stored in standard KML format. Files can be emailed from within the app, or uploaded to a computer using iTunes file sharing. Google earth can display your track and trail files with no conversion necessary, and you can even edit your trails using Google earth to enhance their accuracy.
Properly-formatted KML files attached to emails received on your device can also be opened in Make My Trail. This is a convenient way to share with others, or to upload and download files to your own computer. The number of track and trail files you can store is limited only be the memory capacity of your device.
Following Trails
Utilizing trails stored on the app is straightforward: open the files folder, tap the desired trail(s), then close the files folder once the trails have loaded. The trails become active immediately after they are loaded. Distances and directions to all loaded trails can be viewed in the Trails Table, where the destination trail can be selected if you wish.
Points of Interest
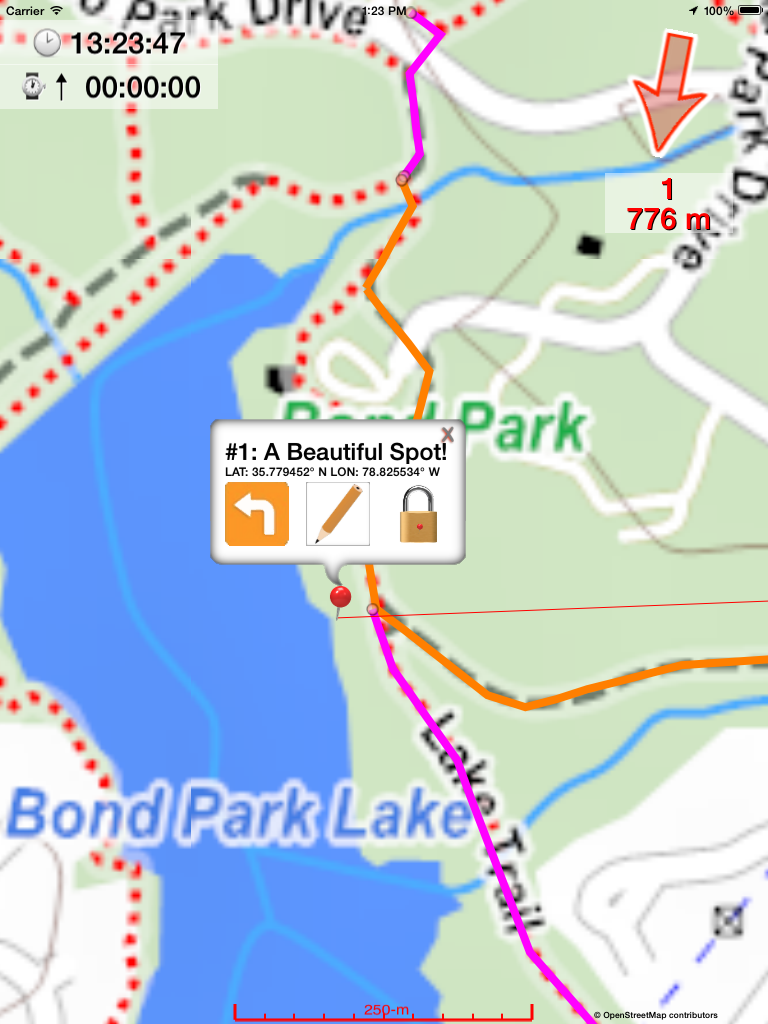
Know of some places along the trail that you’d like to highlight to yourself or others? Flag them with waypoint markers. Make My Trail will save your markers along with your interactive trail. Markers can be selected by tapping them. A selected marker can be dragged to a new location, be assigned a meaningful name, or can be used as a destination for the Apple Maps app for turn-by-turn directions.
In-app Help
Help is presented whenever you launch the app. This behavior can be turned off and on in the native Settings app on the home screen.
You will also notice that a single illustrative sample trail is provided in the app. The example trail can be used to gain some familiarity with how interactive trails look and behave. Unless you happen to be located close to that trail, you may need to create a trail of your own before you can experience Map My Trails on-the-trail features!
![]()
![]()